
Changing the stock on your bolt action rifle isn’t a difficult project. But if you’re like me, the prospect of taking a screwdriver to any part of your $600 gun can induce spontaneous trembling and cold sweats. I’m relatively new to the wonderful world of firearms, and I’ve found step-by-step tutorials to be an absolute must for any gun modification—no matter how simple.
The problem is that most firearm blogs and oh-so-helpful forum trolls don’t bother to explain the basics because, “Duh, that’s easy, ya noob.” So since I was already planning to swap out the factory Tupperware stock on my Savage 11 Hog Hunter with a [track-link url=”https://www.stockysstocks.com/bell-carlson-tactical-medalist-style-2-remington-700-sps-bdl-savage-10-12-weatherby-vanguard-howa-1500-vertical-grip-2092-2096-2997-2998-2999.html” campaign=”BellCarlsonStock” target=”_blank”]Bell and Carlson Tactical Medalist Style 2[/track-link], I thought I’d record the process for any newbie (like me) who might be interested.

Step 1
The single most difficult step in this project was purchasing the correct stock. Some rifles have lots of options for aftermarket stocks; others, like older or specialty rifles, don’t have any. I found the Savage 11 Hog Hunter to be somewhere in the middle. I could have purchased a custom stock from McMillan, but since I don’t plan to take this rifle to Afghanistan I opted for the more cost-effective Bell and Carlson (they make other models for Savage rifles as well, which you can check out here).

I bought it from [track-link url=”https://www.stockysstocks.com/” campaign=”StockyStocks” target=”_blank”]StockyStocks.com,[/track-link] whose customer service team I found to be helpful and accommodating. I gave them my rifle information and described the kind of stock I wanted, and they directed me towards a few options. If you’re having trouble finding an aftermarket stock for your gun, contacting Stocky Stocks or another stock dealer is often the best way to cut through the madness and ensure your new stock will fit. Forums can be helpful, but there’s no substitute for expert advice.
Step 2
Make sure the gun is unloaded before you begin the installation process. (I know, I know—it is. But check anyway.)
Step 3
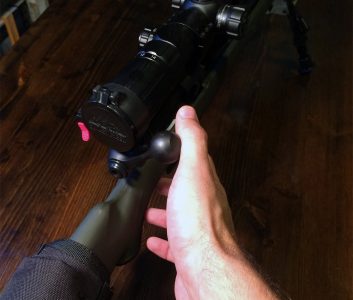
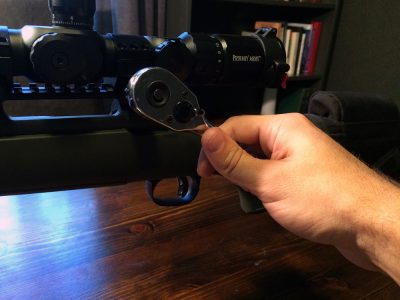
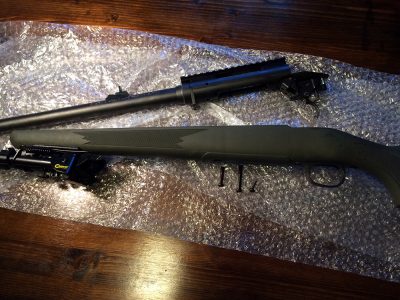
Take out the bolt and remove the scope. It’s not absolutely necessary to remove the scope, but it makes the process easier. You’ll have to adjust your scope’s position to accommodate the new stock, anyway, so you might as well unbolt the scope now.
[one_half]
[/one_half]
[one_half_last]
[/one_half_last]
Step 4
Find a way to secure the gun and/or avoid scratching your table. A bench vise is the best option here, but it’s not necessary. I don’t have a bench vice (or a bench) at the moment, so I just used my office table and the bubble wrap the new stock came in.

Step 5
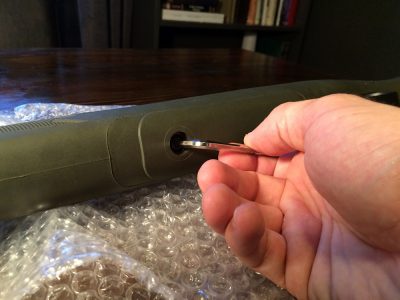
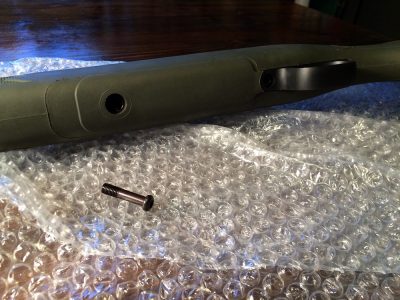
Remove the screws from the underside of the firearm. This might take a little elbow grease if you have an older gun and you’ve never removed the stock. Make sure the tool you’re using fits into whatever kind of screw head you have. If you strip these bad boys, you have a problem.
[one_half]
[/one_half]
[one_half_last]
[/one_half_last]
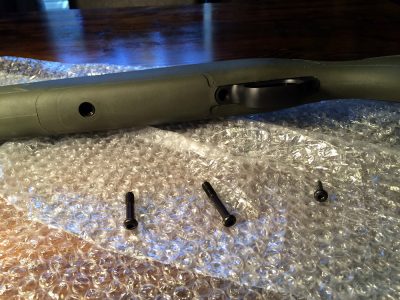
My gun has two action screws (the two closest to the muzzle) and one screw that just acts to keep the trigger guard in place (closest to the rear of the gun). The action screws thread into the action, and the trigger guard screw just threads into the stock.
[one_half]
[/one_half]
[one_half_last]
[/one_half_last]
When you remove the last action screw, be careful that the barrel and action don’t fall out. They’re heavy, and once released from the stock they’ll drop real quick.
Step 6
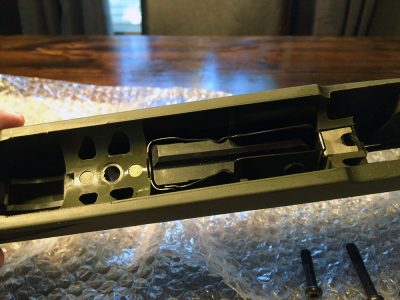
Remove the magazine. If you have a detachable magazine, you can skip this step. But if you have a blind box magazine like mine, you’ll need to take this out and install it in the new stock. Pay attention to how your magazine is installed, as you’ll need to reverse this process when you place it in the new stock.
[one_half]
[/one_half]
[one_half_last]
[/one_half_last]
[one_half]
[/one_half]
[one_half_last]
[/one_half_last]
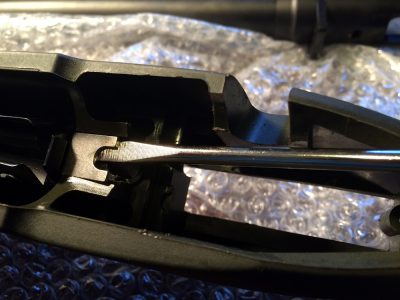
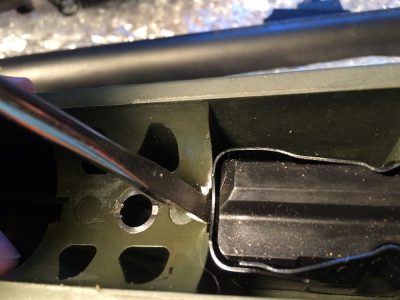
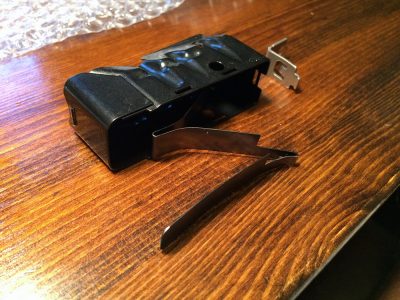
I can’t tell you how to remove your magazine, but if it’s anything like mine it won’t be too difficult. After a bit of poking and prodding, I inserted a flathead into the silver clip you see in the picture and rotated the screwdriver to lift the clip. Then I used the same flathead to pry up from a notch on the other end of the magazine. It popped right out.
Step 7
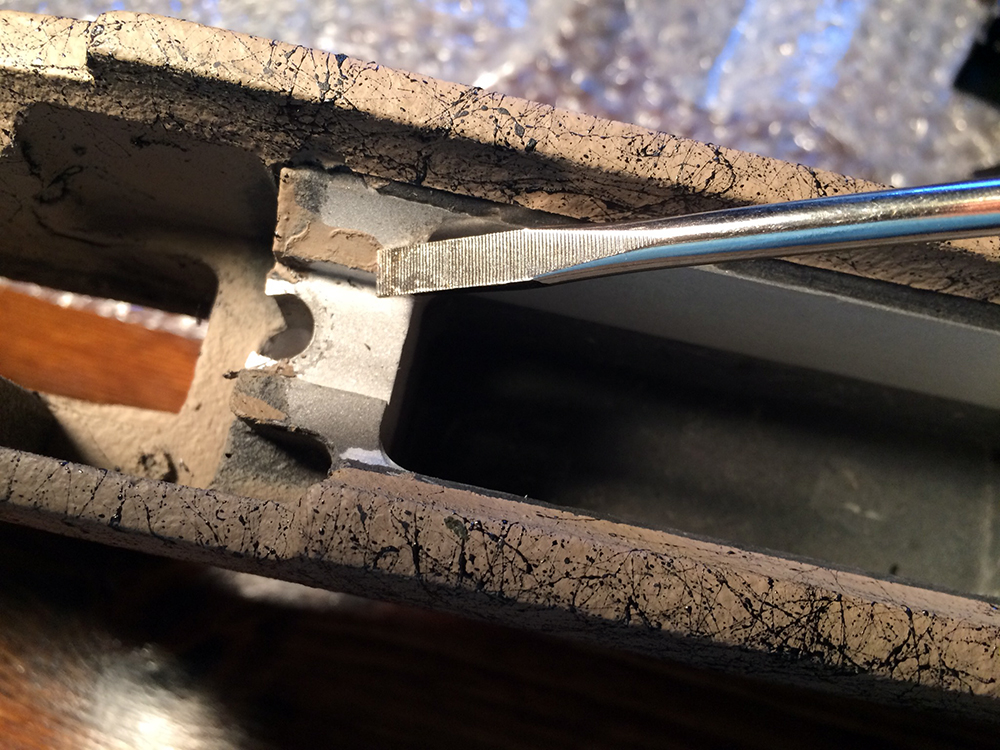
Inspect your new stock. Make sure there isn’t anything weird going on in the action block or the barrel channel. Sometimes the machining leaves small burrs or imperfections that could affect fit as well as accuracy. Mine just had a bit of paint on the aluminum action block, which I scraped off with a screwdriver.
Step 8
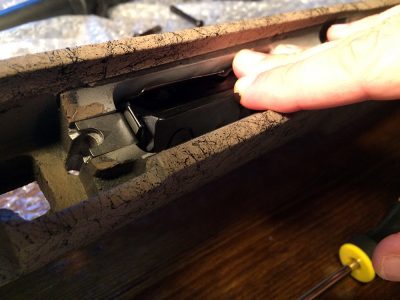
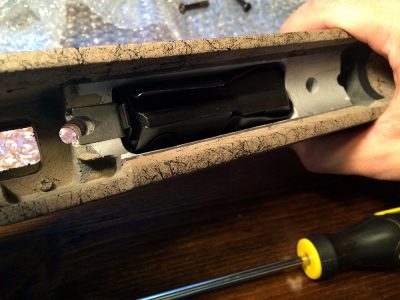
Install the magazine into the new stock. I just pushed the silver clip and the magazine into the action block. The clip provides tension so the magazine stays in place, and the whole unit slides right in.
[one_half]
[/one_half]
[one_half_last]
[/one_half_last]
Step 9
Install the barrel and action into the new stock. This was the only real sticking point in the whole process. When I began to install the barrel and action, I discovered that Bell and Carlson hadn’t pre-drilled a hole for the trigger guard screw. I contacted their customer support, who said that I should drill my own pilot hole. They don’t drill it at the factory because Savage uses a variety of screw sizes, and they don’t want to make the hole too big.
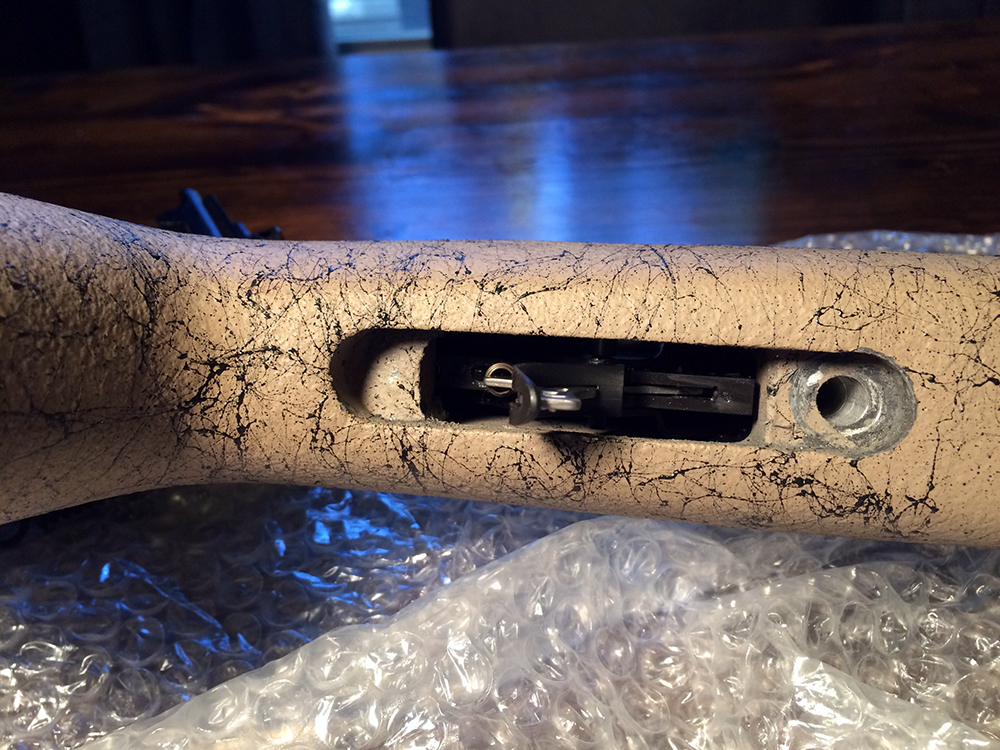
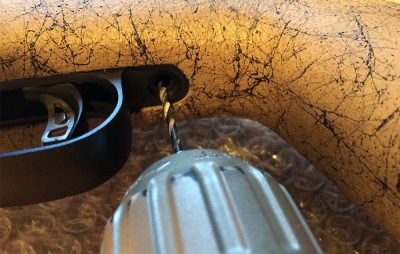
If you remember what I said earlier about trembling and cold sweats, you can imagine how excited I was to take a drill to my brand new stock. But it turned out to be a piece of cake. If you find yourself in this position, you want to be sure not to make the hole too big or too deep. Too big and the screw will just fall out. Too deep and you might drill through the stock. If you aren’t sure which bit size to use, just start small and work your way up.
[one_half]
[/one_half]
[one_half_last]
[/one_half_last]
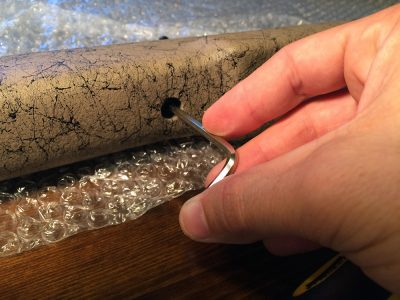
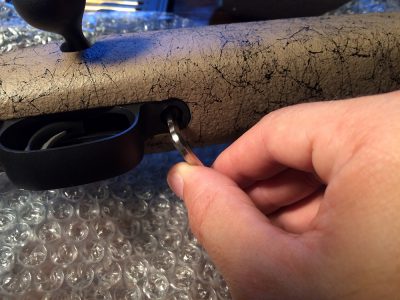
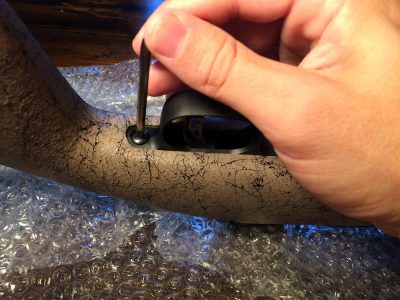
Once I drilled the hole, I began to tighten the trigger guard and action screws. There is, apparently, a bit of controversy surrounding which action screw you should tighten last. The majority of sources say that you should tighten the front screw last, as this puts any residual stress to the rear, away from the locking lugs.
[one_half]
[/one_half]
[one_half_last]
[/one_half_last]
I went ahead with this advice. I also made sure to tighten both screws gradually. I went back and forth between the two screws, incrementally tightening each until I couldn’t turn them anymore with an Allen wrench. You can get even more precise by purchasing a torque wrench and contacting the gun manufacturer to find out the exact torque weight for each screw.
Step 10
Reinstall your bolt and scope, making sure the bolt moves freely and locks in place correctly.
And that’s it! You’re done.
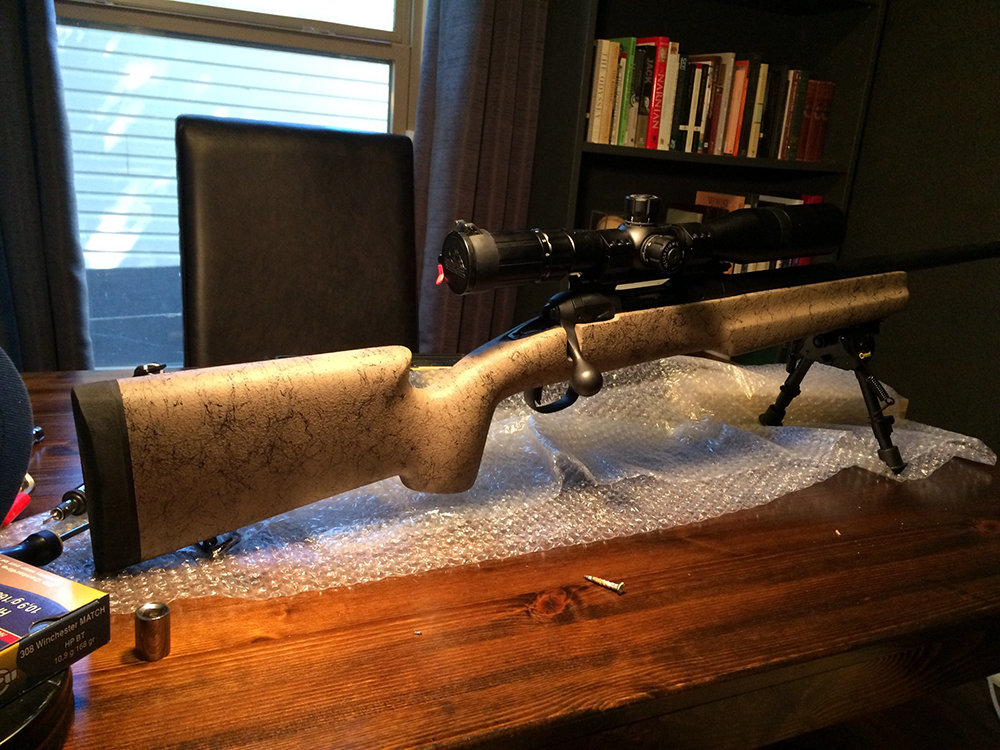
I’m pleased with how it turned out. It’s somewhat heavier than before, but what I lose (or gain, I guess) in weight I’ll gain in accuracy and ergonomics.
If you’re interested in the Savage 11 Hog Hunter (which I highly recommend and reviewed here), you can find one on GunsAmerica for a great price.
And if you’re interested in reading more about stock swapping and installation, check out these helpful GA articles:
M1A Sniper/Competition Rifle – New Adjustable Precision Stock – Scope Installation & Range Report
Archangel M1A Adjustable Stock from Pro-Mag – Gear Review
Blackhawk SpecOps Gen III Shotgun Stock—Hands On Test
###
About the Author: Jordan Michaels is a new convert to the gun world. A Canadian immigrant to the United States, he recently became an American citizen and is happily enjoying his newly-acquired Second Amendment freedoms. He’s a communications professional, a political junkie, and an avid basketball fan.