The vast majority of the hunting population hunts public land in high-pressure units. Figuring out areas in these units that have limited access points can be a game changer in your success. Let’s look at a few tips and tactics that can help you find quality hunting areas in high-pressure hunting units.
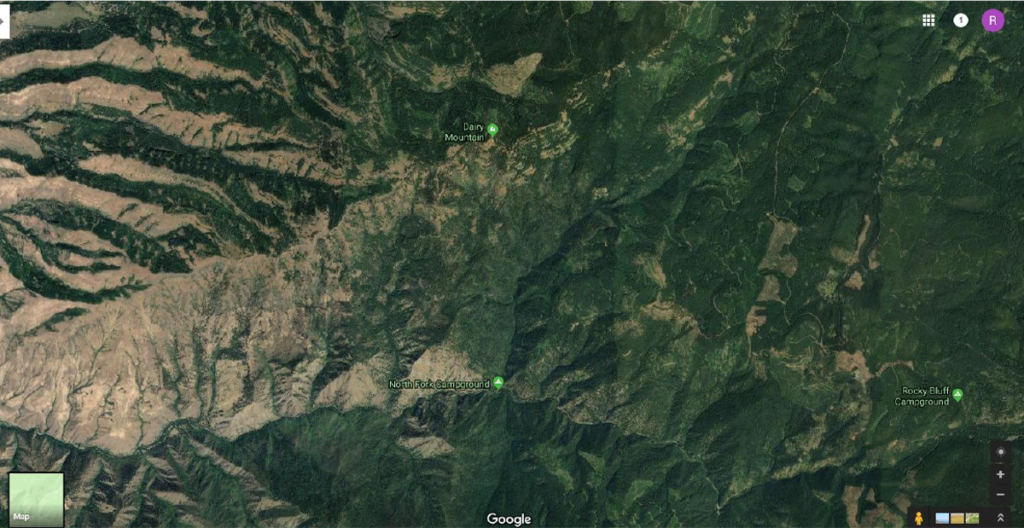
Google Maps is a very useful, free tool at the fingertips of any hunter. Taking a quick glance at the area chosen from your digital device can help show you what the area has to offer, such as terrain features, road systems, and streams. When starting to scout a unit I have found it best to look at areas with little to no road access. It doesn’t have to be a big tract of land, just a place for the animals to get away from the pressure of road traffic. I also like to pair this with places that have the main necessities for the animal you are hunting. Let’s take mule deer for example; I would be looking for large south facing slopes with no roads on the ridge of that south-facing slope or on the adjacent north face.
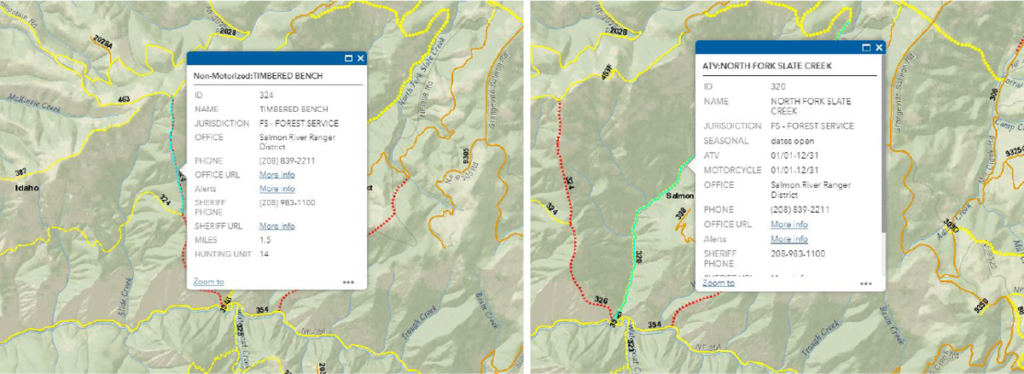
After selecting eight to ten spots from Google Maps we then need to look to see if the state that we are hunting has an interactive trail map website. Most of the western states have a website like this. You may need to call the local fish and game office or forest service office to point you in the right direction. When hunting Idaho I use Idahotrail.gov. This allows us to do a few things. First, it helps us see if there are or was any roads that couldn’t be seen from Google maps.
Beyond just showing the roads, it also shows what type of road it is (seasonal, jeep trail, non-motorized). Secondly, it shows us if there are any trails in the area, defines a trail length, and gives us the forest service office to contact to see the conditions of those tails.
Usually, by this point, I have narrowed the eight to ten down to five or so. It’s then time to put boots on the ground, choose your top two and spend some time out there to scout for sign in the spring and early summer. If these areas are not producing the quantity of sign desired, check it off the list and move on to your next choices.
When scouting these areas, I would highly recommend doing so on foot. This will give you the ability to move slowly and most times without detection. When you find an area that has ample amounts of sign, don’t be afraid to place a trail camera in that region. In these areas, trail camera placement along ridges and at watering points can give you a deep understanding of the quantity and quality of the animals in your selected areas. At this point, let the trail cameras sit for one month.
When you go to check your trail cameras, be sure to take a device to look at the pictures and an extra SD card for your camera. Give the pictures a quick glance in the field and see if you want to keep your trail camera in its present location. If you are not getting the quality or quantity of animals that you are looking for in that area do not hesitate to move it to a different location in that region.
Following these easy steps, you will quickly determine areas that hold animals. By the time the season-openers comes around you will have some new, quality locations to rely on when the pressure gets heavy in the rest of the unit.


