I am not a bench rest shooter. I don’t have the patience for that aspect of shooting sports. But I need a shooting bench from time to time, especially when reviewing guns and getting rifles ready for hunting season. Long story short, I needed a small portable bench, and I didn’t want to spend more than $100 bucks to build it.
I rarely shoot at a public range—I prefer shooting on private land. As such, I wanted a bench that I could fit in the bed of my old Wagoneer. The table needs to be heavy enough to support guns and stand up to recoil, yet light enough that one person can set it up and transport it. Below are pictures to show how I went about building this bench. The total price for this do-it-yourself bench came in around $80.
[three_fourth]
Materials:
I didn’t buy a full sheet of plywood to make this. Most of the home improvement stores sell pieces that are cut to 2×4 feet. I used two pieces of for the top, one 23/32 and the other 15/32. That gave me an overall thickness just under 1 ¼ inch.
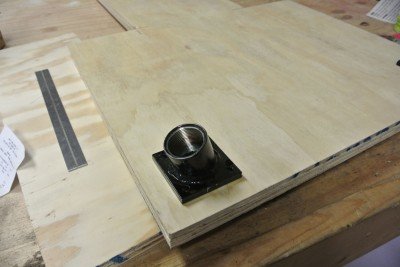
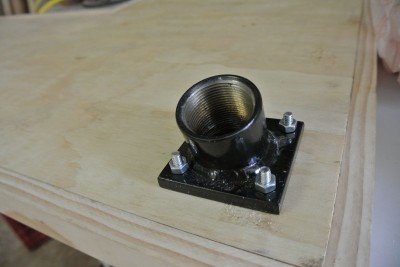
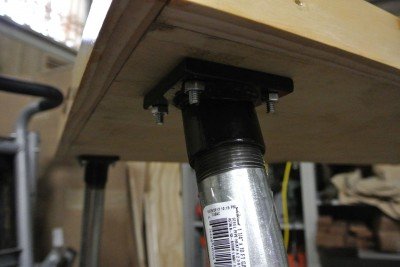
For the leg attachments I enlisted the help of a friend who is a welder. We used 1 ¼ inch pipe couplings that were cut on a 20-degree angle. These were then welded to a 3-inch square piece of ¼ inch plate. Any welding shop should be able to make these for you.
The legs are 1 ¼ inch pipe. I used 36-inch lengths because I wanted a tall table that I didn’t have to sit down to use. You can use any length you want. [track-link url=”https://lowes.com” campaign=”DIY-Shooting-Bench” target=”_blank”]Lowes[/track-link] cut and threaded the pipe for me for free. I bought two 10-foot sections of pipe. It was about half the price of buying the pipe already cut and threaded.
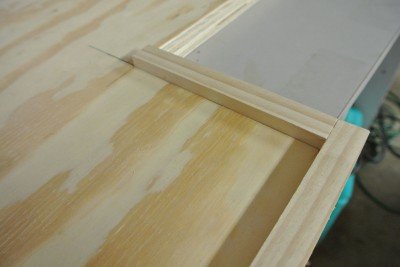
One thing I did do that is optional is frame around the top with 1×2 pine boards. I did this to have a lip around the top of the bench to keep ammunition, pencil, notepad, etc. from sliding off the top from recoil. It took two 6-foot boards to do this.
[/three_fourth]
[one_fourth_last]
Tools:
- Drill and ¼” bit
- Skill saw or table saw
- Hammer
- Finishing nails
- Wood glue
[/one_fourth_last]
Step-by-Step Instructions:
[one_fourth]
[/one_fourth]
[three_fourth_last padding=”0px 0 0 20px”]
Step 1:
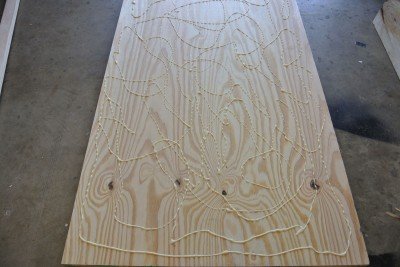
The first step is to glue up the two sheets of plywood. I used Original Titebond, but any quality wood glue will work. It is important to get the glue spread evenly and to make sure that the pressure applied to the two pieces is as uniform as possible.
[/three_fourth_last]
[one_fourth]
[/one_fourth]
[three_fourth_last padding=”0px 0 0 20px”]
Step 2:
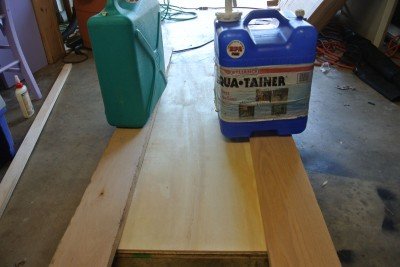
I used weight to clamp the two pieces together. I did put another water jug in the middle that is not in the picture. I let this set on the shop floor overnight for the glue to cure. Gluing two pieces of plywood together, if done correctly, just makes a thicker piece of plywood.
[/three_fourth_last]
[one_fourth]
[/one_fourth]
[three_fourth_last padding=”0px 0 0 20px”]
Step 3
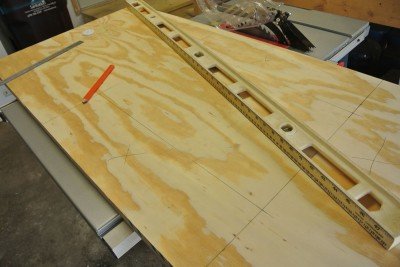
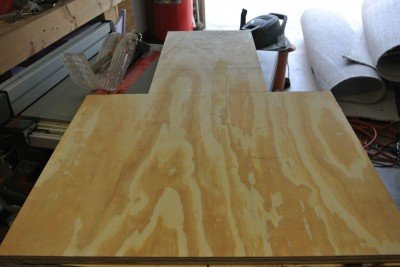
The next step is to draw out the cuts. You can make it pretty much any size you want. To fit in the back of my Jeep, I went with 24 x 40 inches. The side cuts come in six inches. That makes the back 12 inches wide. Also remember that I framed mine in with ¾ inch thick boards. This adds 1 ½ inches to the overall dimensions.
[/three_fourth_last]
[one_fourth]
[/one_fourth]
[three_fourth_last padding=”0px 0 0 20px”]
Step 4
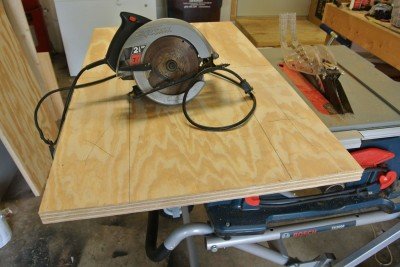
I cut the end off using a skill saw. The fence on my table saw doesn’t have enough travel to let me use it for this cut. I took my time and kept the cut as square as I could. Being a little off is not going to hurt. These aren’t the precision cuts needed for cabinet making or building a guitar.
[/three_fourth_last]
[one_fourth]
[/one_fourth]
[three_fourth_last padding=”0px 0 0 20px”]
Step 5
I used the table saw for the rest of the cuts. It is more precise than the skill saw, but you can still make the table with just a skill saw. The more tools you have, the easier it becomes to do task-specific jobs. If you are a tool junkie, like me, you can use a job like this to justify adding something new to your collection.
[/three_fourth_last]
[one_fourth]
[/one_fourth]
[three_fourth_last padding=”0px 0 0 20px”]
Step 6
Here is one of the leg attachments. I placed them one inch from the edges of the bench top. I simply marked the holes then drilled them with a ¼ inch bit. The flat base allows for easy drilling.
[/three_fourth_last]
[one_fourth]
[/one_fourth]
[three_fourth_last padding=”0px 0 0 20px”]
Step 7
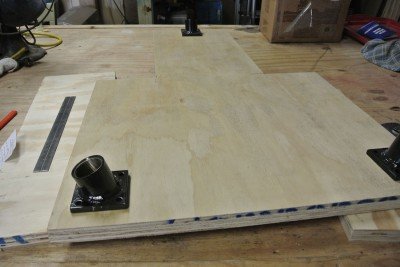
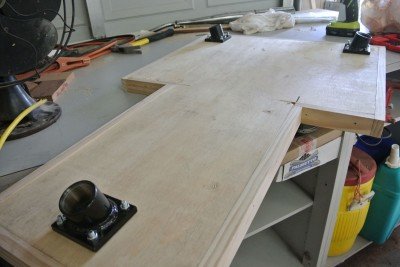
The leg attachments are laid out. A triangular pattern like this keeps the legs out of the way of your legs and helps with the stability. A triangular base is more secure than a square base. If you need additional weight, you can drill holes in the legs and hang sandbags or weights between them.
[/three_fourth_last]
[one_fourth]
[/one_fourth]
[three_fourth_last padding=”0px 0 0 20px”]
Step 8
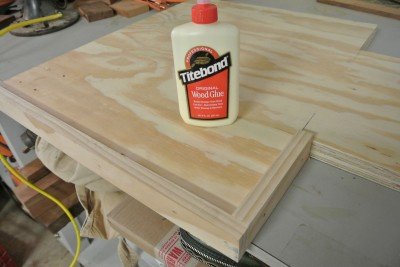
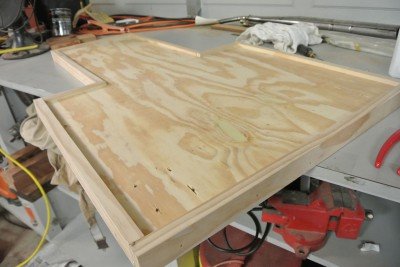
I attached the side boards with wood glue and finishing nails. I used a pneumatic nail gun, but a hammer works just as well. Be sure you leave enough room on the top of the table for your shooting rest, and be sure that your overall width and length still fits in your vehicle (if that’s an issue).
[/three_fourth_last]
[one_fourth]
[/one_fourth]
[three_fourth_last padding=”0px 0 0 20px”]
Step 9
Note the lip I left around the top to help keep objects from rolling off. This is completely optional, but really helpful. The first time you watch match grade ammo roll off, nose first, into the dirt, you’ll understand what I mean. And if you do anything with small parts, like scope mounts or trigger pins, you will appreciate the extra protection.
[/three_fourth_last]
[one_fourth]
[/one_fourth]
[three_fourth_last padding=”0px 0 0 20px”]
Step 10
All framed in on my messy workbench. At this point, it is easy to test out layout. I decided on the square shoulders, though you could make the shape of the table any way you like. It doesn’t have to be this wide, but I wanted room for tools, and a chronograph.
[/three_fourth_last]
[one_fourth]
[/one_fourth]
[three_fourth_last padding=”0px 0 0 20px”]
Step 11
The leg attachments are all mounted up. I will add lock washers to this later. The bases need to be as secure and permanent as possible. The legs themselves should screw in snug, but don’t over-tighten them, or you may not be able to get them apart in the field.
[/three_fourth_last]
[one_fourth]
[/one_fourth]
[three_fourth_last padding=”0px 0 0 20px”]
Step 12
All mounted up on the bottom. When you are finishing the piece, remember to finish the bottom. If you only put finish on the top, there won’t be consistent protection against humidity, and the whole top will warp.
[/three_fourth_last]
[one_fourth]
[/one_fourth]
[three_fourth_last padding=”0px 0 0 20px”]
Step 13
Leg screwed in and standing up. I used a 20-degree angle on the leg mounts for added stability. I’ll eventually cut off these screws flush with the bolts to keep them from catching on clothing or gun straps.
[/three_fourth_last]
[one_fourth]
[/one_fourth]
[three_fourth_last padding=”0px 0 0 20px”]
Step 14
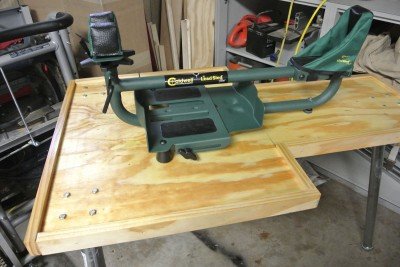
Add rifle and weights to the lead sled and we are ready to go. I brushed on a couple of coats of polyurethane finish, too. You can spray on finish or brush it. Poly is easy and protects well enough for a simple project like this. If you want to get serious about it, a thick coat of varnish would work well, too.
[/three_fourth_last]
And that’s it. DIY. The whole thing, from planning the piece to the last coat of poly, took me somewhere around five hours. The whole bench came in under $80. There were some nails and glue that would add to the expense if I didn’t already have them. The bench does just exactly what I need it to. So get to work, whitetail season isn’t that far out. Time to get ready to get ready, if you know what I mean.
